Requestors
Requesters primarily manage Projects and Batches. The projects contain the user interface of tasks defined in an HTML template. The batches are created with CSV files that define the data of the tasks. Requesters can also create user accounts for workers and assign them to groups.
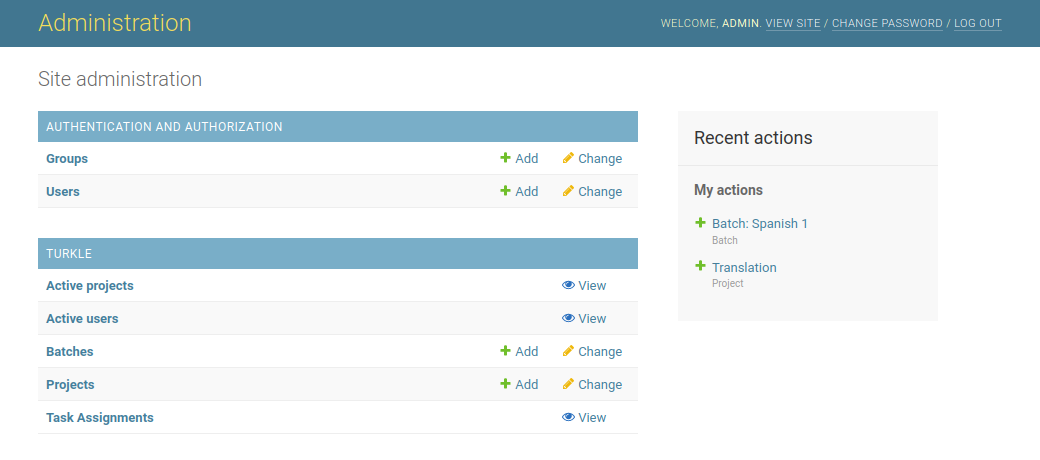
Creating groups
A group contains a set of workers. Projects can be restricted to particular
groups. Create a group from the administration home by clicking on the
Add button for Groups, entering a unique group name, and selecting the
workers that belong in the group.
Creating users
To create worker user accounts, click the Add button for Users and
enter their information. Workers can be also be assigned to groups
on this page.
Creating projects
It is best that you design the HTML template with an editor first before
creating the project. There are example templates in the examples directory
and documentation in the template guide.
When you click on the Add button for Projects, you will be able to
upload the template and configure other aspects of the project. The
user interface defined by the template cannot be previewed until a batch of
tasks are created. When creating a new project, you will often want to set
the project to be inactive until you have perfected the template and previewed
it.
Creating batches
A batch of tasks is created from a CSV file. There are multiple ways to
get to the page for adding a new batch. We recommend viewing all projects
and then clicking the Publish Tasks button for the project.
Then upload the CSV file and set its attributes. Upon saving the batch,
you will see a preview of the tasks created.
Downloading results
To download the annotations of a batch of tasks, navigate to the Batches
page in the administration site. For each batch, there are buttons for
downloading the results as a CSV file.

Output CSV Format
Each row of the CSV results file contains
the template variable input fields, the Worker-submitted form fields,
and some metadata fields. For each template variable ${foo}, the
CSV file will contain a column named Input.foo. For each submitted
form field named bar, the CSV file will contain a column named Answer.bar.
The CSV file will also have the fields:
HITId- Task IDHITTypeId- Project IDTitle- Project nameCreationTime- Time when the Task was created from CSV input fileMaxAssignments- Number of requested Assignments per TaskAssignmentDurationInSeconds- Amount of time before a Task Assignment expiresAssignmentId- Task Assignment IDWorkerIdAcceptTime- Time when User accepted an Assignment for a TaskSubmitTime- Time when User submitted an Assignment for a TaskWorkTimeInSeconds- Length of time between when User accepted a Task Assignment and when User submitted that AssignmentTurkle.Username- Username of User who completed Assignment
Scripts for requesters
Adding users
The scripts/add_user.py script adds a single user. Run it with the -h option for details.
The script/import_users.py script reads a CSV file to add users to Turkle.
The file must be formatted like:
username1,password1
username2,password2
To support password resets, add an additional column for email address:
username1,password1,email1@example.com
username2,password2,email2@example.com
Adding tasks
With an HTML template file and a CSV Batch file, use the
script/upload_tasks.py script to:
create a new Project using the HTML template file, and
publish a Batch of Tasks using the rows of the CSV file
If you have already created a Project using an HTML template, you should use the admin UI to publish additional Batches of Tasks.
Downloading results
The scripts/download_results.py script downloads all Tasks that have been completed
into a directory that the user selects.